How to Plan and Enjoy Your First European Vacation Part 2: Obtaining Your Passport and Visas
In my last travel planning article, I discussed picking the right destination for your trip abroad. Now that you know where you want to go, let’s talk about the next most important step—getting a passport and any required visas. If you already have a passport, now is the time to check to see when it expires. Some countries require that your passport have an expiration date at least six months beyond your requested travel dates, so it’s not something you want to cut close. It can also be more challenging if you are getting passports and visas for multiple family members as you’ll have to submit applications, photos, fees and other documentation for each individual. The bottom line—don’t put off getting your passport and visas—dive right in.
Obtaining or Renewing Your U.S. Passport
The U.S. Department of State, which is responsible for issuing and renewing passports, has made the process as easy as possible. Just visit the Travel.State.Gov website and follow the guidance, which depends upon whether you are renewing your passport or seeking one for the first time. The following is an overview of that guidance, but be sure you read the State Department’s guidance in its entirety when you are ready to apply for or renew your U.S. passport.
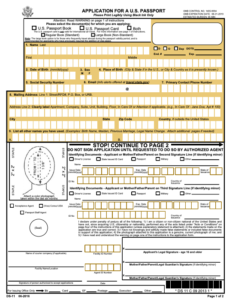
If you meet any of the following criteria, you must complete Form DS-11 – U.S. Passport Application, and apply for your passport in person:
- You are applying for your first U.S. passport;
- You are under age 16;
- Your previous U.S. passport was issued when you were under age 16;
- Your previous U.S. passport was lost, stolen, or damaged; or,
- Your previous U.S. passport was issued more than 15 years ago.

Form DS-11 is not complex. It asks basic information about you, where you live, and where and when you were born. It also asks for information about your parents and your spouse, including their places of birth and citizenship status. These questions are intended to help validate your identity and your citizenship because you must be an American citizen or a non-citizen national to have a U.S. passport. (Non-citizen nationals are persons born in American Samoa or Swains Island, as well as children born abroad to two non-citizen nationals or to one alien parent and one non-citizen national parent). Your U.S. passport identifies you as a U.S. citizen or non-citizen national, so the State Department must require proof of your status before your new passport can be issued, or in the case of items 2-5, above, renewed.
You can find Form DS-11 online on the State Department’s Passport Forms website. There you will be able to choose between using the form filler application, which is what I recommend, or filling out a PDF version of the form. The form filler application asks questions and uses your answers to fill out the form for you. When you are finished, you simply print the completed form. Whether you use for form filler application or the PDF option, DO NOT SIGN the DS-11 Form at this time. Instead, you must take the form, together with any required documentation and the passport processing fee, to the nearest Passport Acceptance Facility, which is often a U.S. post office. You can find where one is by entering your zip code in the State Department’s Passport Acceptance Facility Search Page. Once you submit your application to the Passport Acceptance Facility, processing normally takes between 6-8 weeks. If you need faster processing, consult the Where to Apply table on the State Department website.
Because additional forms and documentation may be required if you are applying for a passport for a minor, you should consult Travel.State.Gov to be sure you fully address these requirements.
You must submit a qualifying photo with your passport application. This photo will appear in your passport once it is issued. I recommend not trying to take the passport photo yourself. The photo must meet stringent standards and you don’t want your application to be delayed or returned because your photo doesn’t qualify. Some Passport Acceptance Facilities will take the required photo while you are there submitting your application, so that is a good way to ensure your photo will be accepted by the State Department. You should confirm with your Passport Acceptance Facility in advance if this service is available and how much it will cost before relying upon this option. I usually go to my local Walgreens or CVS photography department and have them take my passport photo because, in my experience, they know how to do it correctly. I also purchase 4 to 6 extra passport photos (or more if I’m traveling to a lot of countries) because visa applications (discussed below) often require that you submit passport photos as part of your application.
Before you go to the Passport Acceptance Facility, call or check its website online to confirm hours of operation and whether an appointment is necessary. When you go, take your completed but unsigned Form DS-11, enough money (cash, check, money order, debit or credit card) to pay the processing fee, a passport photo that meets State Department requirements (unless the Passport Acceptance Facility will take your photo), required proof of citizenship or non-citizen national status, and color copies of the front and back of other photo identification if you are over 18 or the parent or guardian identifying a passport applicant under 18.
I recommend making a copy of everything you will submit before going to the Passport Acceptance Facility so you have a complete record of your application. Also, note that for the proof of citizenship or non-citizen resident evidence, you must submit either original documents or certified copies, as well as a copy of each document. Making sure you have everything you need before you go will save you time and frustration by avoiding being unable to submit your application because you are missing required items. If you have everything you need, the Passport Acceptance Facility will administer an oath and witness your signature on the DS-11, and accept your application for processing by the State Department.
You will be able to renew your current U.S. passport by mail if all of the following are true regarding your current U.S. passport:
- You submit it with your application;
- It is undamaged (other than normal “wear and tear”);
- It was issued when you were age 16 or older;
- It was issued within the last 15 years; and,
- It was issued in your current name (or you can document your name change with an original or certified copy of your marriage certificate, divorce decree, or court order).

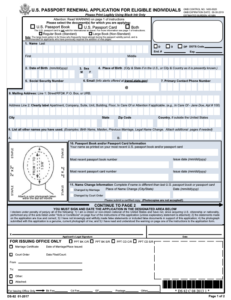
To renew your current U.S. passport by mail, you must complete a Form DS-82 – U.S. Passport Renewal Application For Eligible Individuals. The State Department’s DS-82 webpage walks you through filling out the form by asking you to answer a series of questions. When you are finished, you will be able to print a completed Form DS-82. Some of the information you’ll need is found in your current U.S. passport, so you’ll want to have that with you when you fill out the form on the website. As I needed to renew my passport, I filled out the form following the instructions on the website and it only took between 5 and 10 minutes. The webpage also calculates the fee required because you will need to include a check or money order made payable to the U.S. Department of State for the full fee amount when you mail in your renewal application.
In addition to the completed Form DS-82 and your check or money order, you’ll also need to include in the mailing envelope your current passport, a qualifying passport photo, and any other documentation the State Department website specifies for your specific situation. As discussed above, I recommend not trying to take the passport photo yourself.
The State Department offers expedited passport processing for an additional fee, but if you plan far enough in advance, you can save money by selecting all of the standard processing options.
One last note before turning to visas. For adults traveling abroad with minors under 18 (or in some cases, under 19), if both parents are not traveling with the minor, U.S. Customs and Border Patrol recommends the adults have a signed and notarized consent letter making it clear the non-traveling parent or parents consent to the travel.
Obtaining a Visa
In addition to a passport, your destination country or countries may require you to obtain a visa prior to your arrival. Again, the State Department Travel.State.Gov website is the best starting place to research what the visa requirements are for the countries you intend to visit. The website will also list any travel alerts, vaccination requirements, currency restrictions, and other information. For example, if you search for Russia, you will see that a tourist visa is required, travel alerts are in effect, there are no vaccination requirements, and currency limitations apply.
Once you have digested all of the information the State Department provides, you should consult the embassy website for the country you will be visiting. If a visa is required, the embassy website will provide detailed instructions on how to apply. Because some countries may require you to mail your U.S. passport to the embassy or to a processing center, along with the visa application, the fee payment, and any other required documentation, you should determine the visa requirements and apply for your visa(s) well in advance. If you must mail in documentation, be sure to keep copies of everything you submit and comply with all submission requirements. Failure to do so may delay your application or result in it being returned without action.
One last point on visas. Some firms and tour operators offer assistance in obtaining visas in return for a fee. I have never used such services because I have always been able to decipher the requirements and comply on my own, and you can too. You simply have to read and carefully follow the instructions your destination country’s embassy provides. However, if you would feel more comfortable having someone else wade through the visa bureaucracy for you, be sure to research the firm providing the service first to ensure they are reputable and experienced. Finally, be prepared to pay extra for their services.
Passports and visas open the doors to the world, so it’s worth taking the necessary time to read the State Department and foreign embassy instructions, complete the applications correctly, supply all of the required documentation, and submit the correct fees. Above all, start well in advance so you’ll have time to ask questions if you don’t understand the requirements or you need to obtain documentation to support your applications. The goal is to have your passport and visa(s) in hand long before your travel dates so you can focus on the more exciting aspects of your travel plans.


